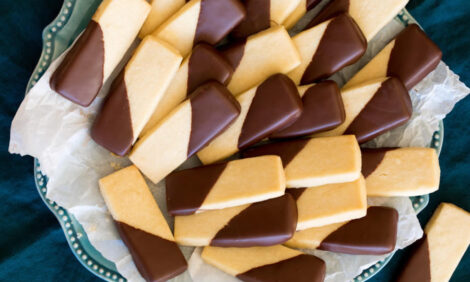
I love cookie tins, but making multiple types of cookies is a bit of a hassle. To help such people enjoy cookie tins, this is a recipe for making cute-looking cookie tins by topping them with chocolate and nuts on a single piece of dough.
Ingredients
- Unsalted butter 50g
- Powdered sugar 35g
- Salt 0.3g
- Egg yolk 10g
- Light flour 80g
- Almond powder 20g
Instructions
- Put the butter in a bowl and use a rubber spatula to cream it. The butter should be so hard that when you press it with your finger, you can insert your finger without any resistance.
- Add salt and powdered sugar to 1 and mix with a rubber spatula.Once mixed, mix with a hand mixer until pale and fluffy.
- Add the egg yolk to step 2 and mix with a hand mixer.
- Add the sifted soft flour and almond flour to step 3 and mix in a cutting motion.
- Once the dough is no longer powdery and comes together into a ball, use a rubber spatula to scrape the dough around the bowl to evenly connect it.
- Cut a disposable baking sheet into 21cm wide pieces and gather the dough into a stick. If you shape the dough with the same thickness, the thickness will be uniform no matter where you cut it. Shape it into a bar and let it rest in the refrigerator for about an hour. If you’re in a hurry, you can put it in the freezer, but if you freeze it until it’s solid, it will break when you cut it.
- Divide the chilled dough 2:1.
- For the first one, crush and sprinkle roasted sliced almonds. Moisten a brush with water, lightly brush over the sablé, and sprinkle with crushed almond slices.
- For the second, sprinkle granulated sugar in the same way. *We recommend putting granulated sugar in a plastic bag to prevent the granulated sugar from scattering.
- Cut into 8mm width. The heat penetrates deeper than 1cm, making it crispy and delicious.
- We recommend placing the cut sables on a baking sheet and letting them cool for about 30 minutes.
- For the button style, poke 4 holes with a bamboo skewer, then lower the temperature of the oven to 170°C (preheated to 180°C) and bake for about 20 minutes. *Please adjust the temperature and time according to your oven.
Decoration
- Place the couverture chocolate in a small heat-resistant container, heat in the microwave at 500W for 1 minute, and mix. It won’t melt in 1 minute, but the key here is that if it melts completely, the tempering will collapse, so stop heating when it’s this solid. After 1 minute, gradually dissolve in 10 second increments with any lumps remaining.
- Finally, melt it with residual heat, and it’s OK if it’s below 32 degrees.
- Dip chocolate on about half of the cooled sable.
- Remove any excess chocolate, place on a baking sheet, and place in the freezer to cool quickly. About 5 minutes.
- Once the base chocolate has hardened, put the remaining chocolate into a cornet and draw half a diagonal line.
- Before the diagonally lined chocolate hardens, add the pistachios. Next, draw a thread imagining a cross in the hole of the button.
- Squeeze out a large amount of the remaining chocolate from the cornet. *Actually, squeeze it onto the OPP film. The chocolate will turn out beautifully.
- Press the sable on top of the squeezed chocolate. While watching from the side, spread it out until it is the same size as the sublet. Chill in the freezer for about 5 minutes to harden.
- Once the chocolate has hardened in the freezer, remove it from the OPP film and draw your favorite pattern. In winter, the chocolate in the cornet will harden, so if it starts to harden, melt it in the microwave at 500W for less than 10 seconds, keeping an eye on it.
- You can make it plain, with buttons, with nuts on the side, half covered in chocolate, or completely covered in chocolate, depending on your ideas.


